> For the complete documentation index, see [llms.txt](https://docs.proxyshard.com/llms.txt). Markdown versions of documentation pages are available by appending `.md` to page URLs; this page is available as [Markdown](https://docs.proxyshard.com/site-navigation/teamspaces.md).
# Команды
Команды позволяют делиться доступом к прокси и заказам, назначать разрешения и работать в общем пространстве. Один аккаунт может создать до 10 команд.
## Открытие раздела Teams
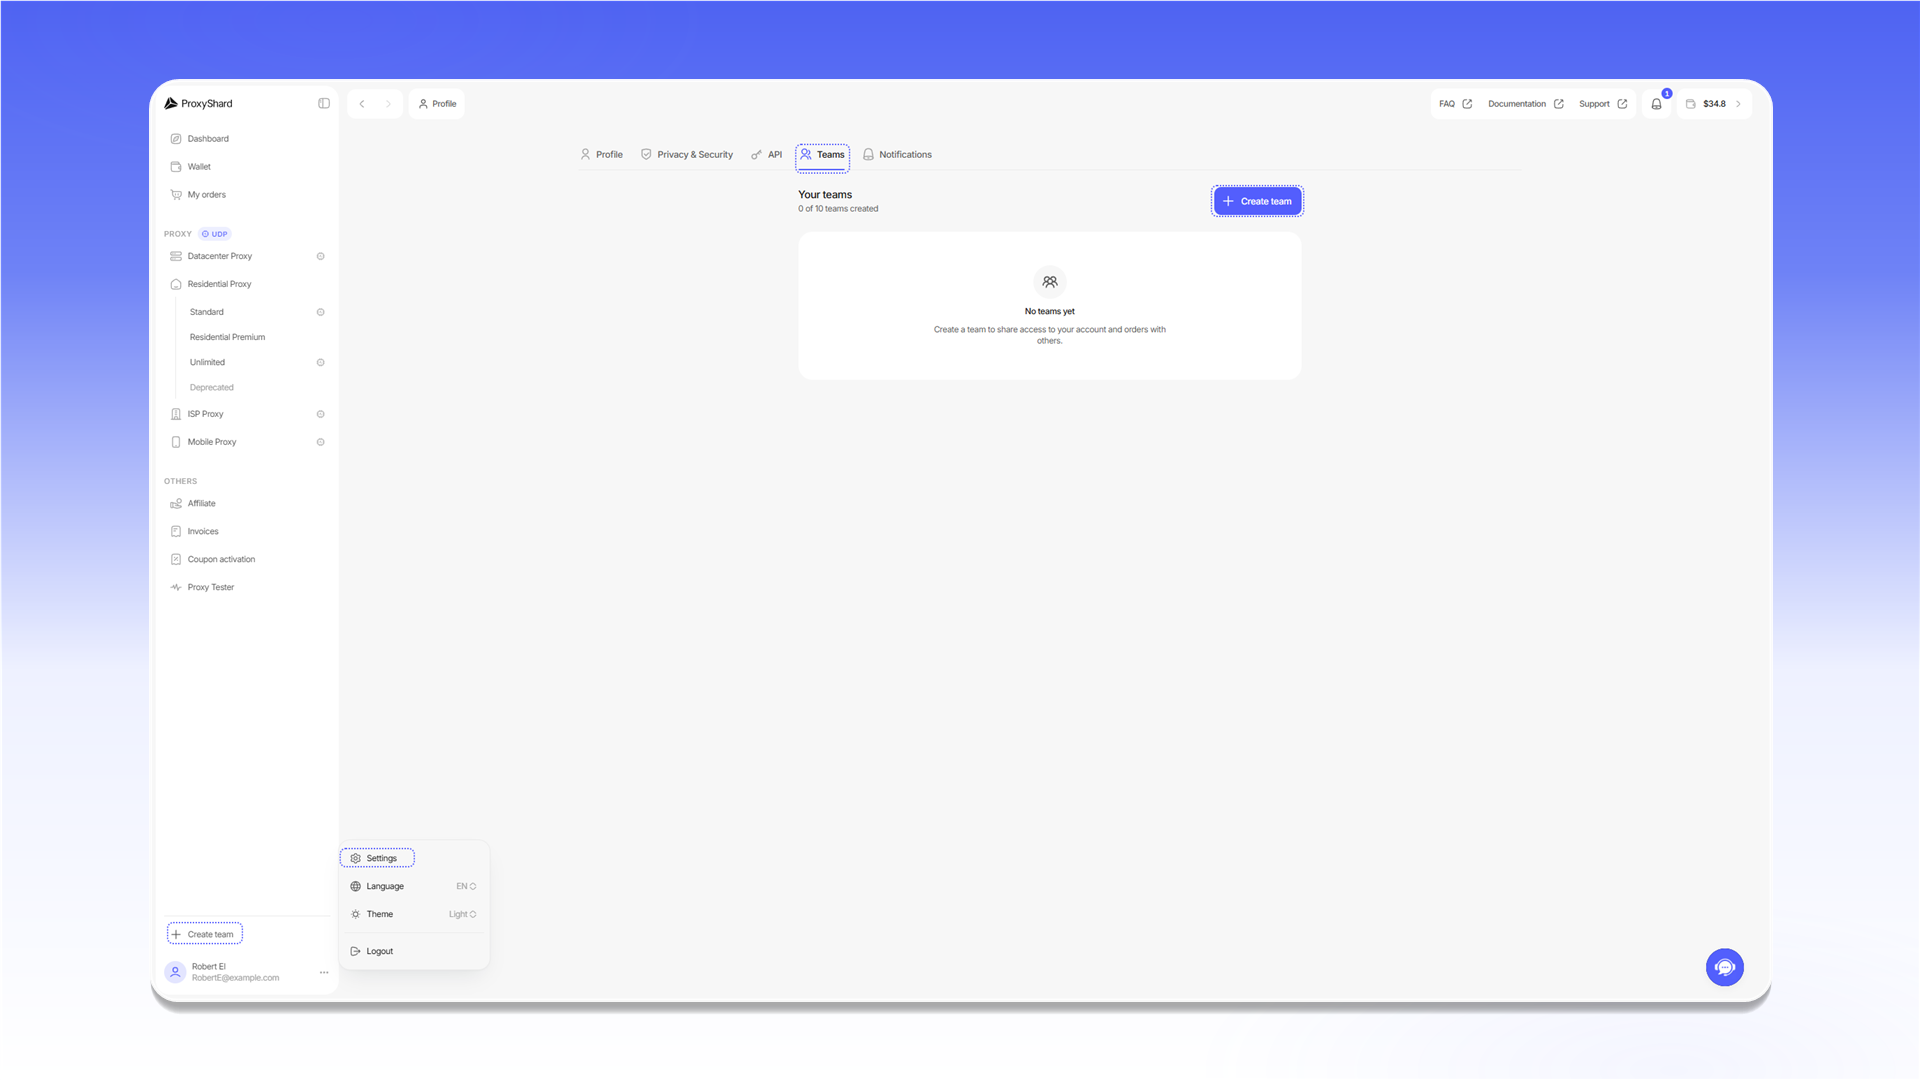
1. Нажмите иконку профиля в левом нижнем углу.
2. Выберите `Settings`.
3. Откройте вкладку `Teams`.
## Создание команды
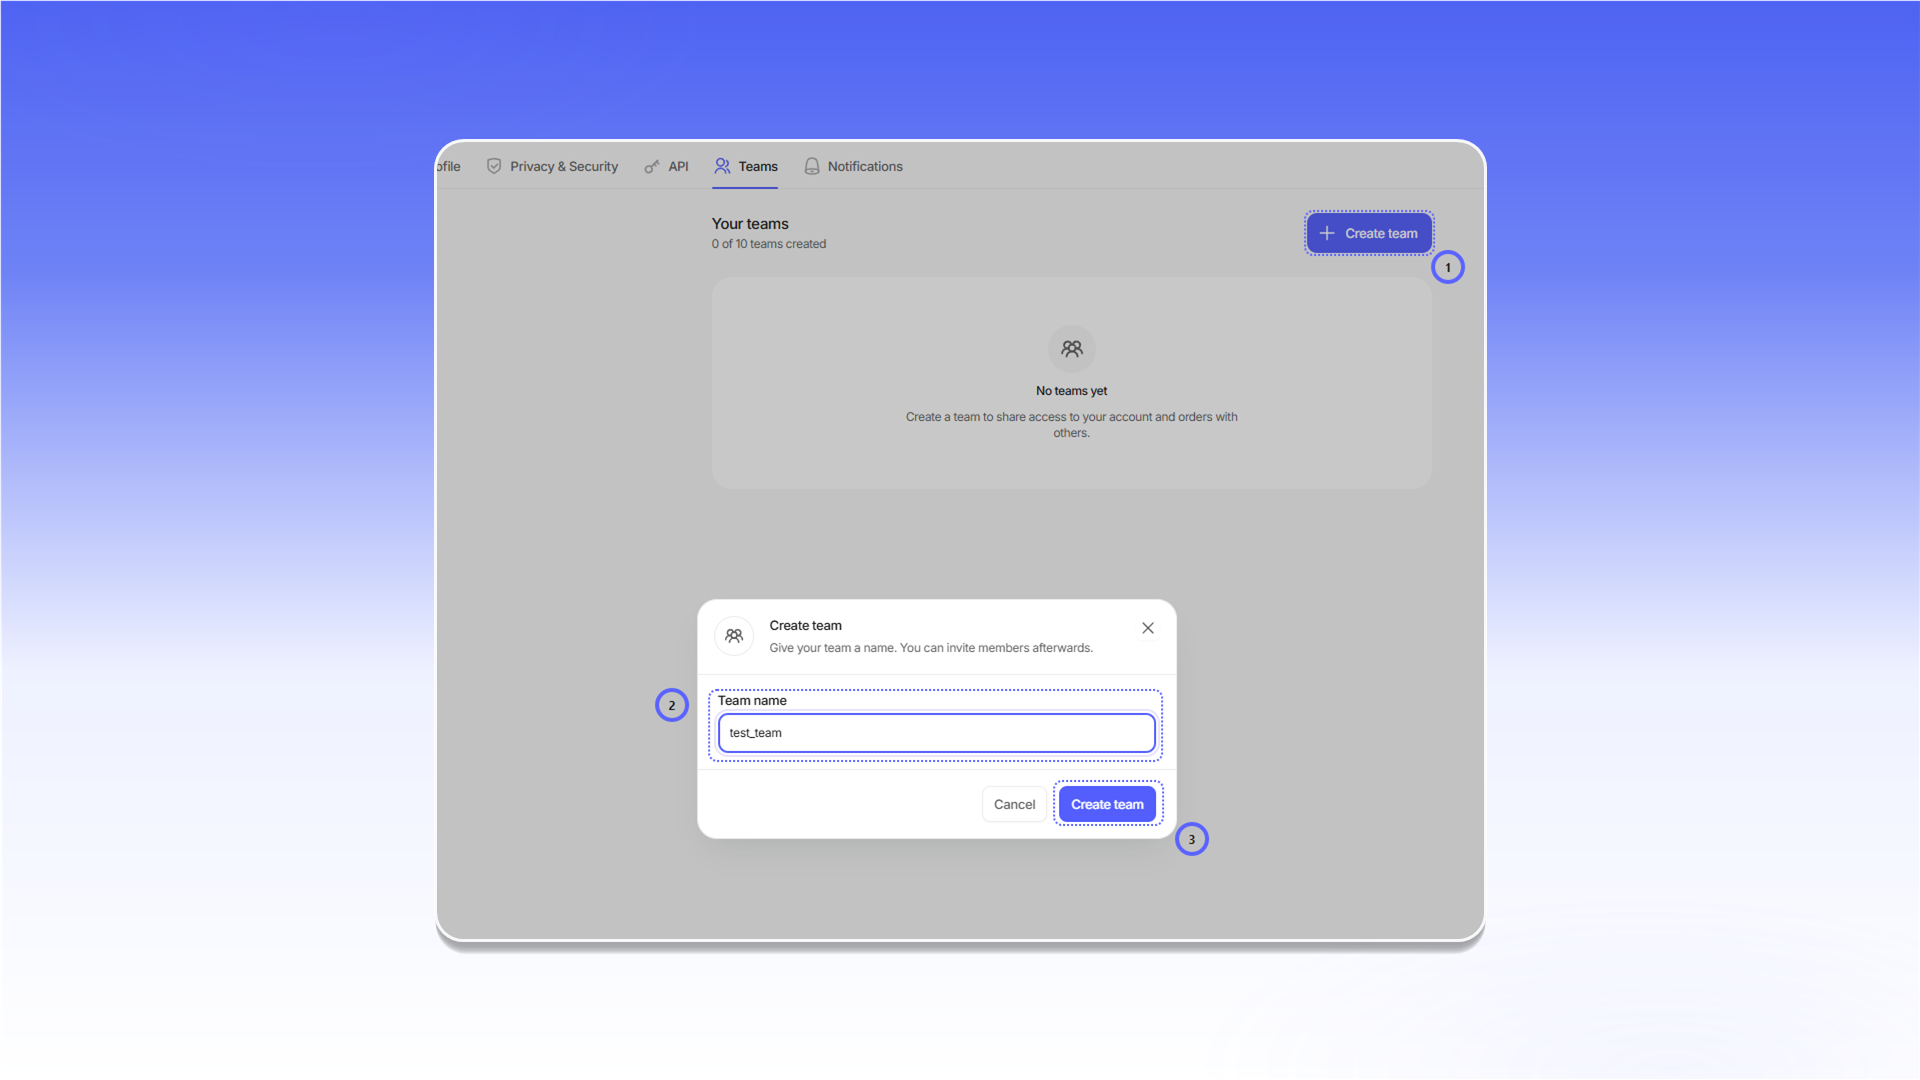
1. Нажмите `Create team`.
2. Введите название в поле `Team name`.
3. Нажмите `Create team` в окне создания.
## Переключение между командами
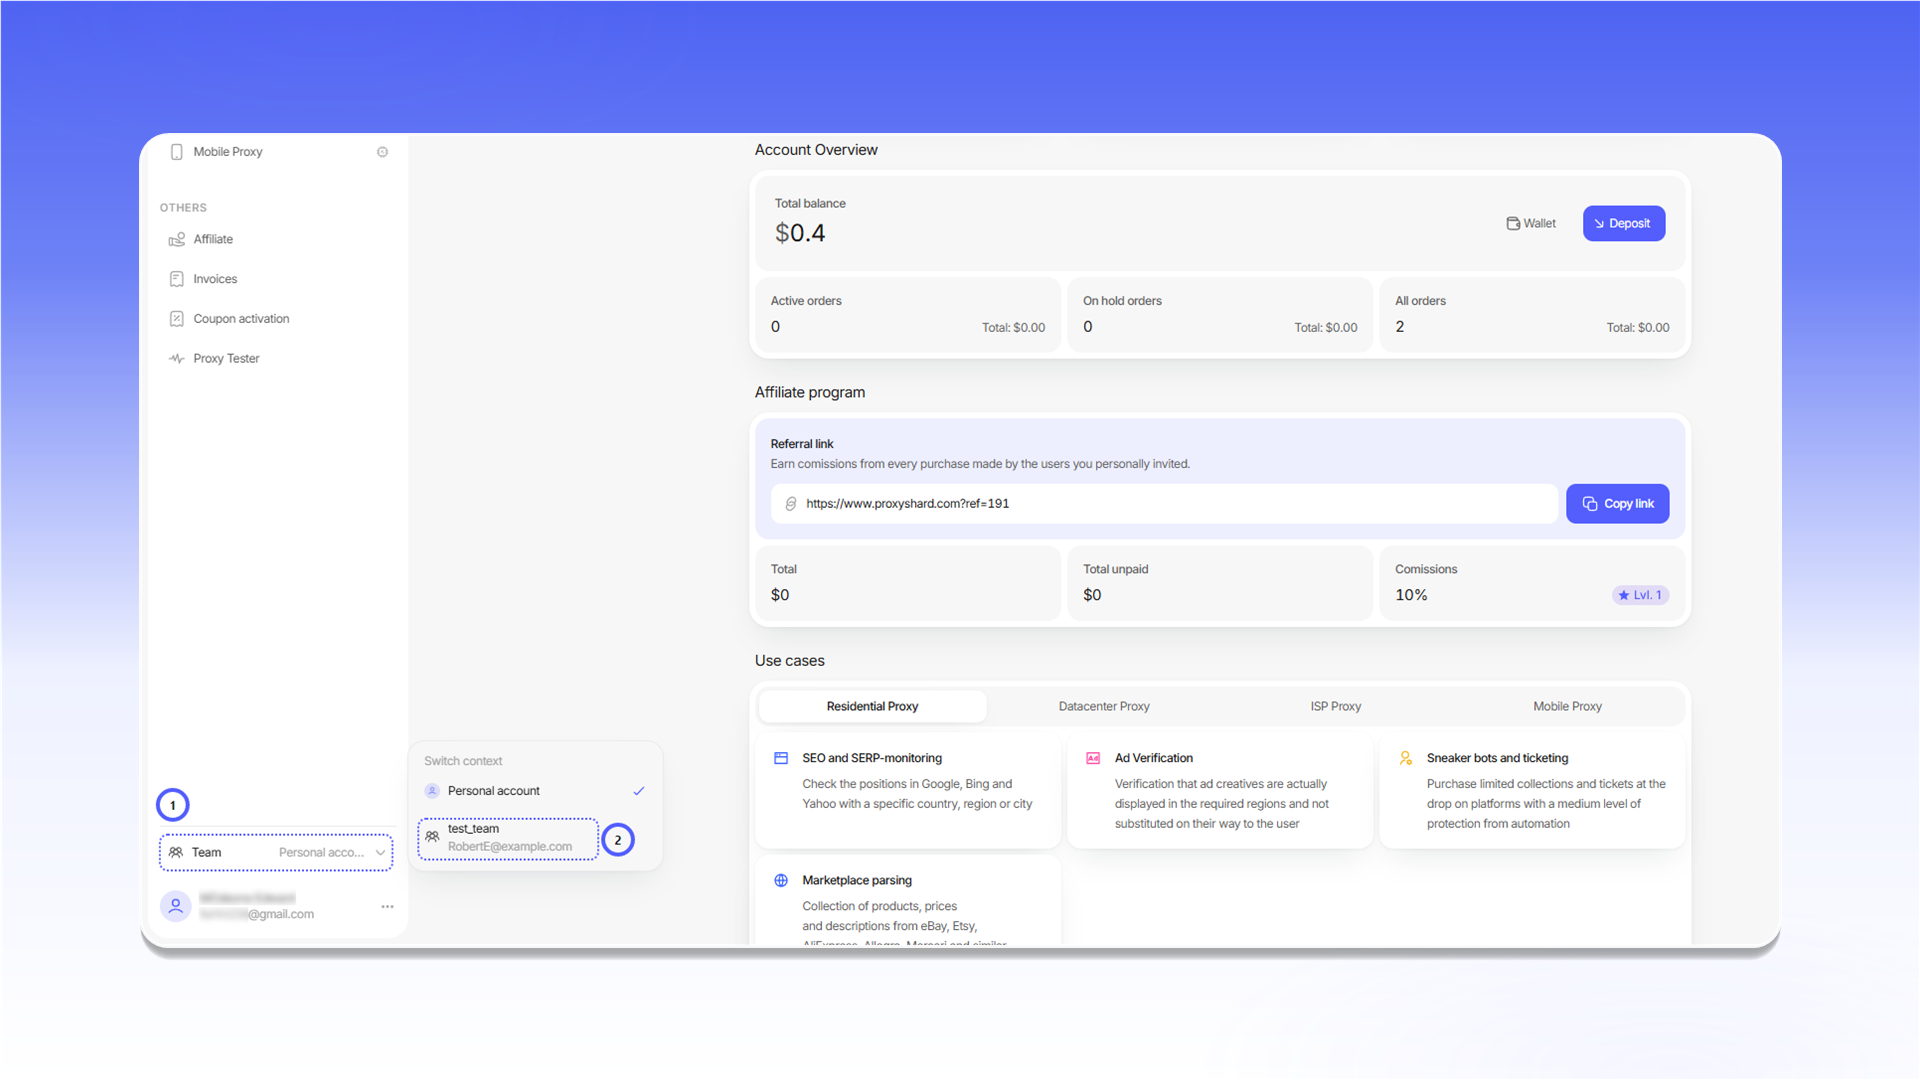
Откройте меню аккаунта в левом нижнем углу, выберите `Team`, затем нужную команду. После переключения в интерфейсе будут отображаться доступные этой команде заказы и функции.
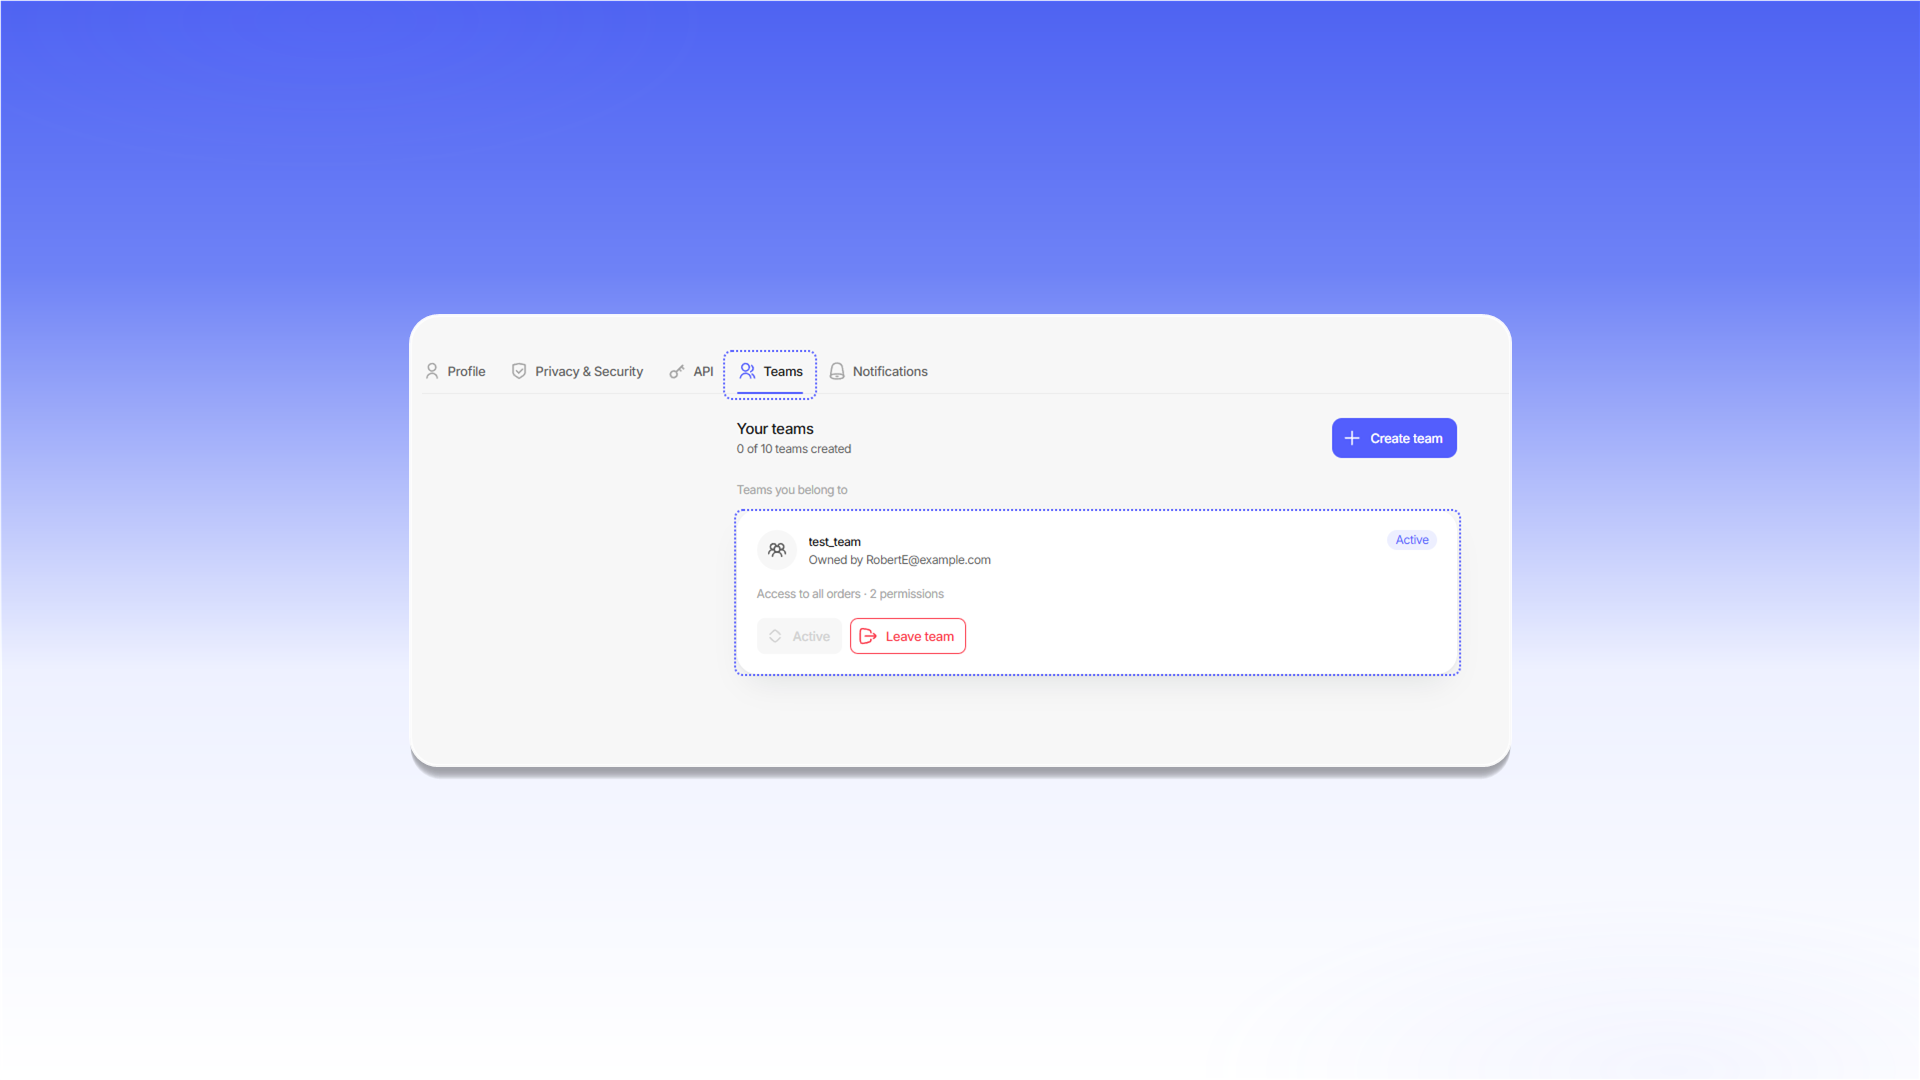
Команды, в которых вы состоите, находятся в блоке `Teams you belong to`. Активная команда отмечена статусом `Active`. Чтобы выйти из команды, нажмите `Leave team`.
## Настройки команды
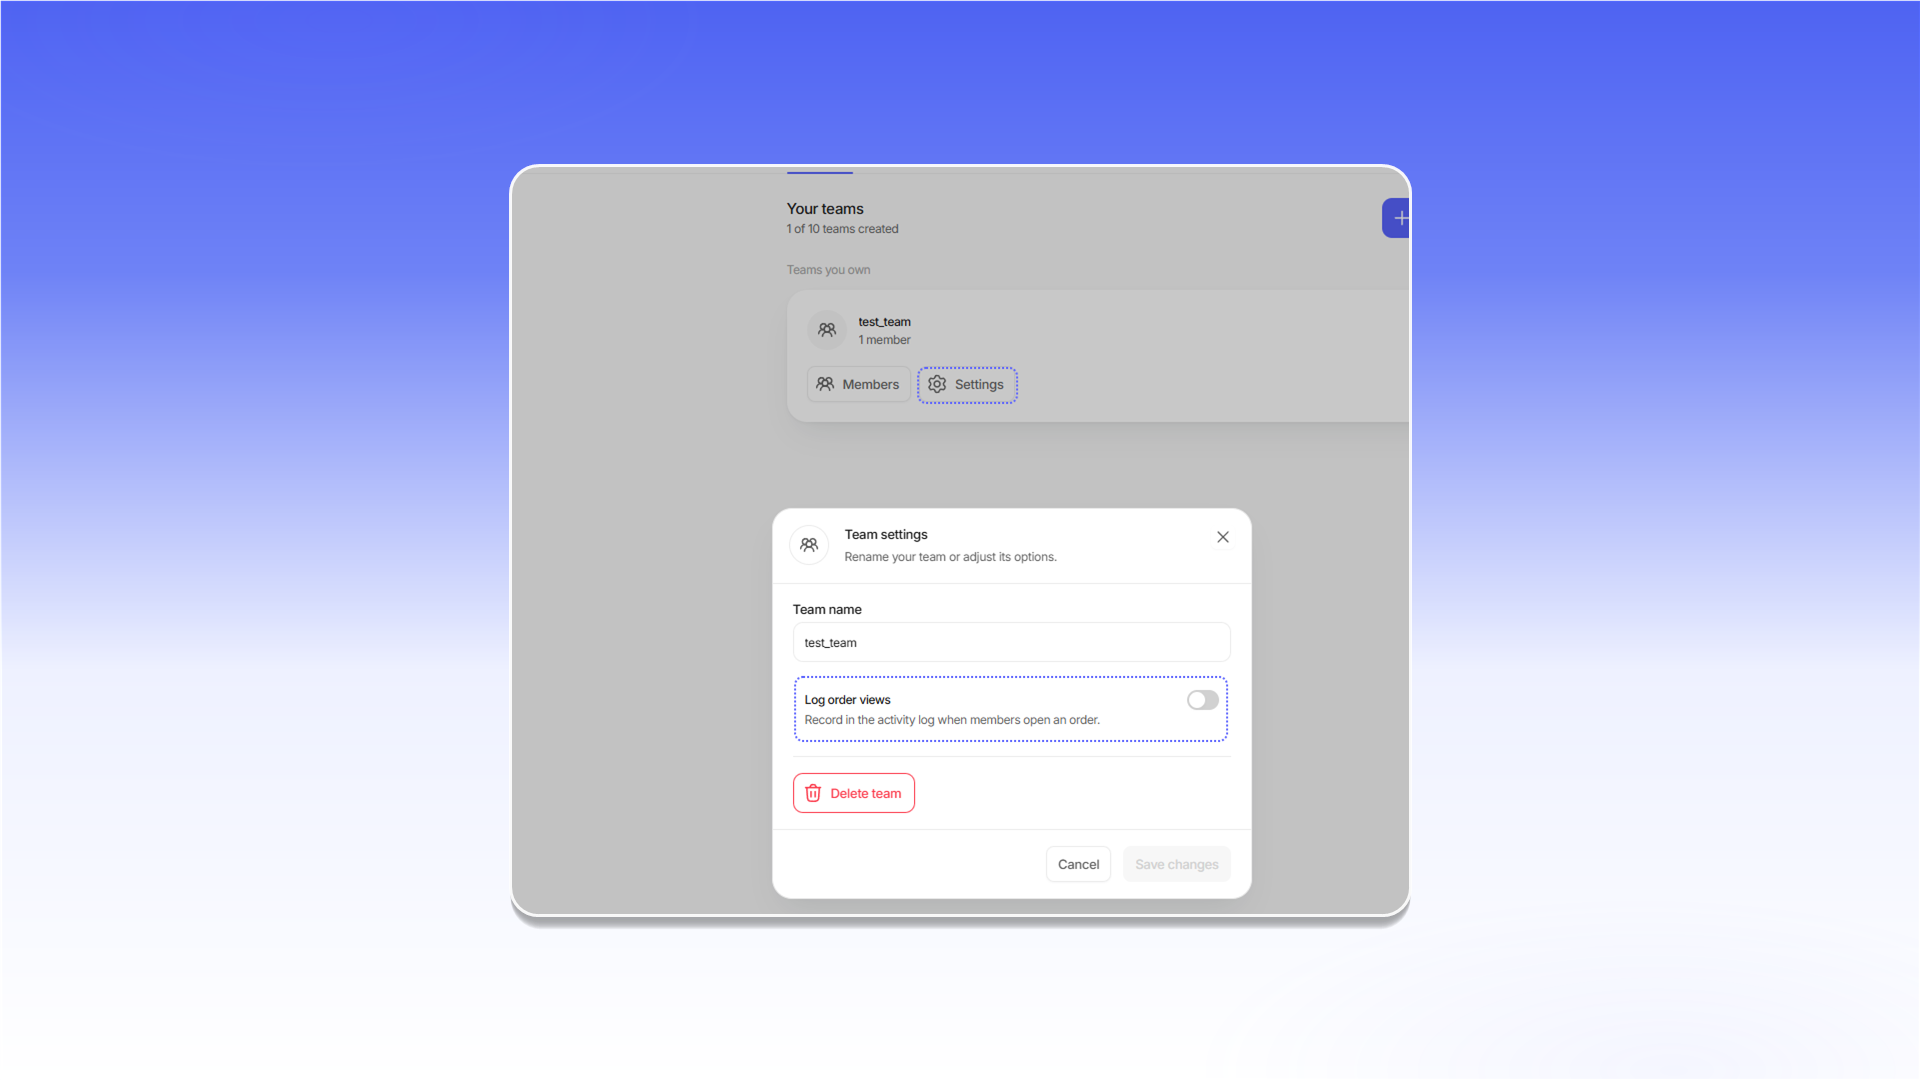
Владелец может открыть `Settings` на карточке команды, изменить `Team name`, включить `Log order views` или удалить команду. После изменения настроек нажмите `Save changes`.
## Добавление участников
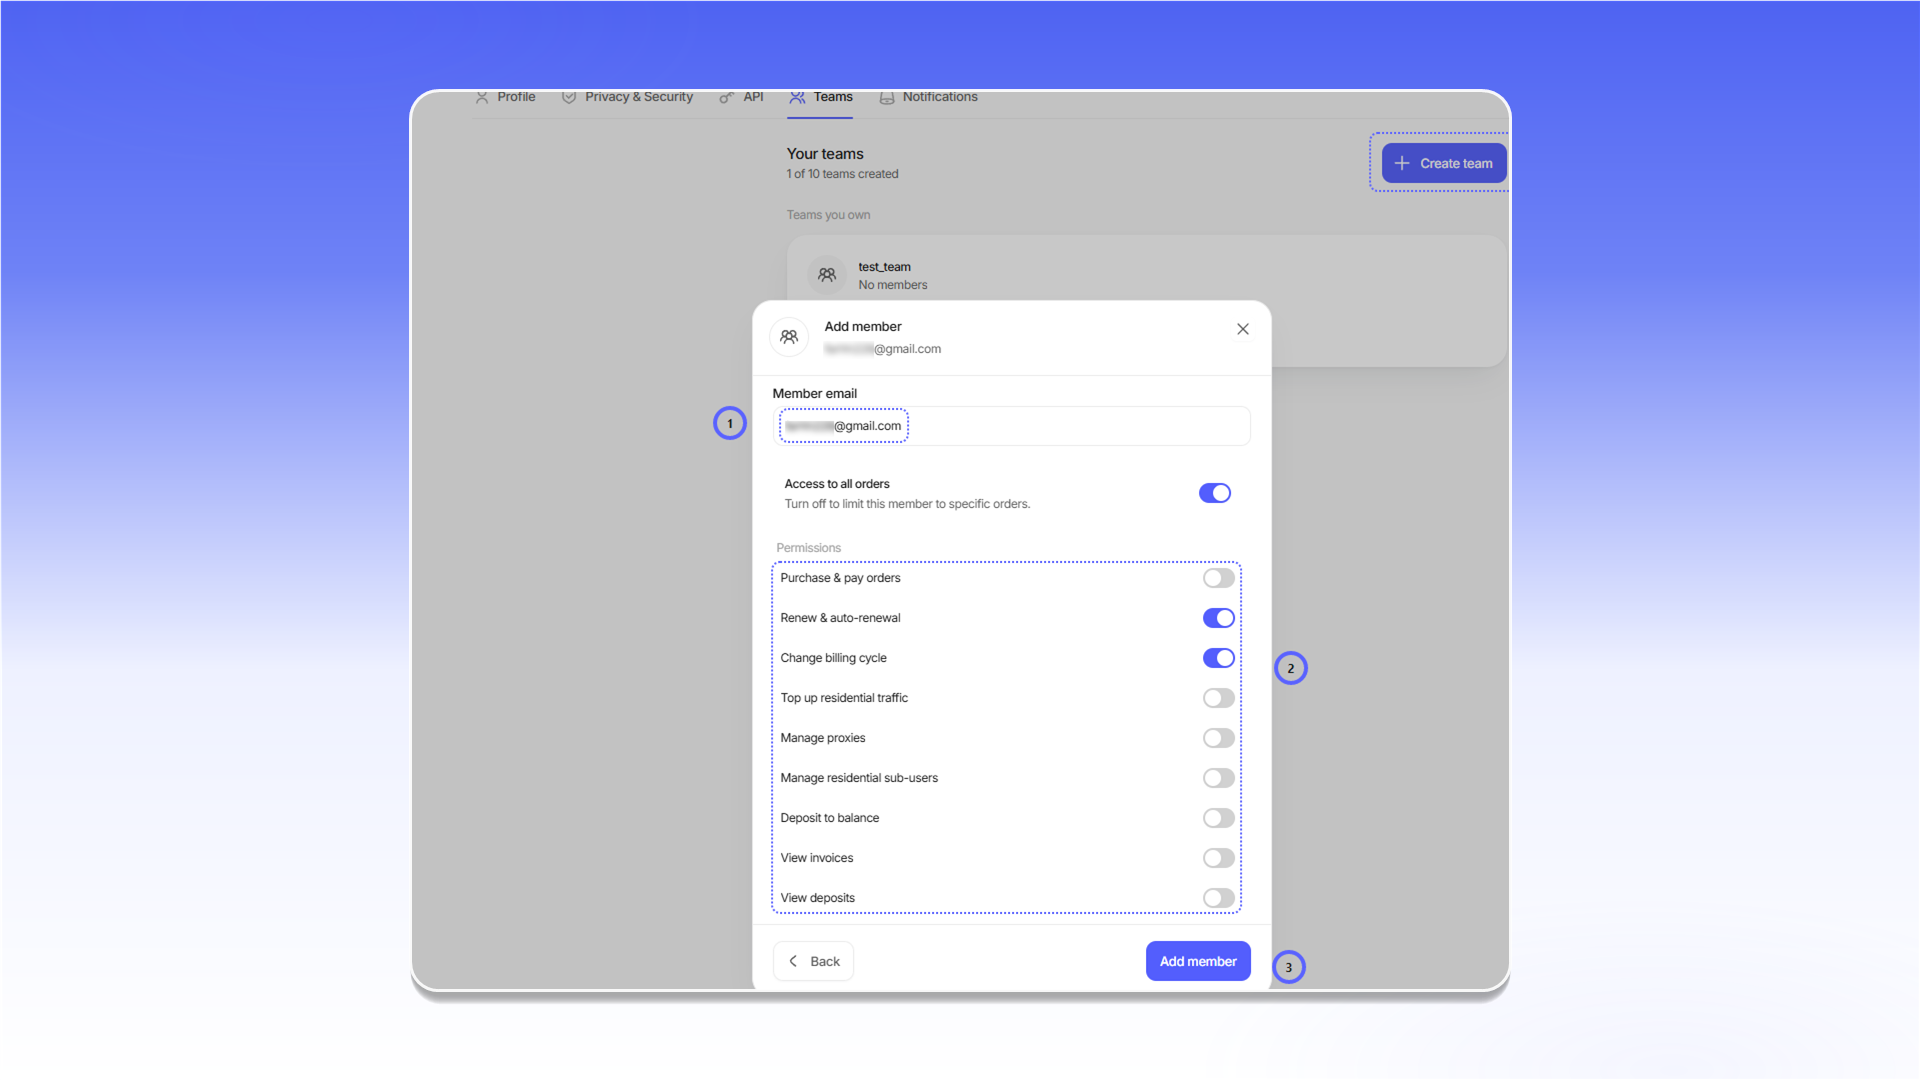
Откройте `Members` на карточке своей команды и нажмите `Add member`. Затем:
1. Укажите адрес в поле `Member email`.
2. Настройте доступ к заказам и необходимые разрешения.
3. Нажмите `Add member`.
---
# Agent Instructions
This documentation is published with GitBook. GitBook is the documentation platform designed so that both humans and AI agents can read, navigate, and reason over technical content effectively. Learn more at gitbook.com.
## Querying This Documentation
If you need additional information that is not directly available in this page, you can query the documentation dynamically by asking a question.
Perform an HTTP GET request on the current page URL with the `ask` query parameter, and the optional `goal` query parameter:
```
GET https://docs.proxyshard.com/site-navigation/teamspaces.md?ask=&goal=
```
`ask` is the immediate question: it should be specific, self-contained, and written in natural language.
`goal` is optional and describes the broader end goal you are ultimately trying to accomplish on behalf of the user. GitBook uses it to tailor the answer towards what is most useful for that goal.
The response will contain a direct answer to the question and relevant excerpts and sources from the documentation.
Use this mechanism when the answer is not explicitly present in the current page, you need clarification or additional context, or you want to retrieve related documentation sections.